Hey there, folks! It’s your pal Edwin, coming at you straight from gosondors.com. I’ve got something exciting to talk about today: the must-do maintenance tasks for your beloved e-bike.
Whether you’re a newbie in the e-bike world or a seasoned rider looking for some guidance, this article has got your back.
We’ll dive into all the nitty-gritty details of keeping your e-bike in tip-top shape so that you can ride with confidence and keep the good times rollin’.
So, let’s buckle up and get ready to explore the essential maintenance tips that’ll have your e-bike running smooth like butter!
E-Bike Maintenance: Disc Brakes
In my opinion, brakes are the most critical part of an e-bike. Therefore, let’s start there and learn how to keep your brakes properly tuned and in good shape.
Previously, I highly recommend hydraulic disc brakes.
One of the main reasons is that they require minimal maintenance until you wear out the brake pads. In that case, you’ll need to replace them.
But for the most part, there’s not much you need to do to keep them functioning optimally.
However, on more budget-friendly e-bikes that have mechanical cables running from the levers to the brake calipers, routine maintenance is necessary to ensure proper brake performance.
Over time, you might notice that as you pull the brake levers, they gradually move closer to the handlebars until they eventually touch them. This can be a significant issue because when your levers touch the bars, you experience a loss of braking power.
I see this problem often, where people don’t know how to make the necessary adjustments, resulting in reduced braking effectiveness and longer stopping distances.
Let’s go through the steps to take care of this and keep your brakes in optimal working condition.
First, we’ll start with minor adjustments you can make at the brake lever.
As you pull your brakes over time, the cable stretches, and the brake pads wear down. This causes the lever to move closer to the handlebar.
To create more space, you can gradually open up the barrel adjustment located here.
Give it a few turns and slide this stop back to lock it in place. This adjustment provides additional cable length, allowing for more time before you need to make a larger adjustment.
Keep in mind that this is a temporary solution and not a significant adjustment. The macro adjustment will be made near the brake calipers.
When the barrel adjustment is fully extended, and you can no longer make any more adjustments, it’s time to bring it back in.
Let me now show you how to make the macro adjustment at the caliper.
You’ll find either a micro adjuster or a bolt that you can use for this purpose.
If there’s a micro adjuster, it functions similarly to the lever adjustment we discussed earlier.
If not, you can proceed with the macro adjustment by using a five-millimeter Allen wrench to loosen this bolt here.
I prefer to keep my fingers on the backside here just to ensure that the cable doesn’t slip through.
It’s under spring tension, and now that it’s loose, I’ll slide the cable through a bit more, usually about two to four millimeters. It doesn’t require much.
Then I’ll tighten the bolt holding the cable in place. What this does is it pulls more cable through to compensate for the stretch that has occurred over several months of braking. It resets the brake calipers so that they are closer to the rotor.
Once you’ve done that, you want to ensure that it’s not too tight. You don’t want your brake pads rubbing against the rotor every time you brake, as it will wear them down more quickly.
To check, simply pick up the wheel and spin it. In my case, the brakes were already set correctly, so I had too much tension on the cable.
I need to loosen it a bit to get it back to where it was before this demonstration. That should give me the right amount of tension.
Now, as you can see, my wheel spins freely, and I’m good to go.
E-Bike Maintenance: Derailleur Tuning
Another common maintenance concern on an e-bike is tuning the derailleur. Over time, it may require some small adjustments due to cable stretch.
You want to make sure you’re not experiencing any clicking, grinding noises, or sudden chain jumping while pedaling. Once you understand the different adjustments on the derailleur, it becomes quite easy to do.
When operating your gears, ensure that the chain stays in the desired gear and smoothly shifts to the next gear ring each time you change gears.
If you hear strange clicking or grinding noises, something is not right, and an adjustment is needed. To make these adjustments, I recommend starting with the chain on the lowest gear, which is actually the largest gear at the back.
Similar to the brakes, there’s a barrel adjustment here for fine-tuning. If you find that your cable has stretched over time and the shifting isn’t crisp, you can turn the barrel adjustment out a bit, maybe one or two turns.
This increases the cable tension and may solve the issue, usually caused by cable stretch.
However, another potential problem could be incorrect limit adjustments. These limits prevent excessive cable pulling or tension release.
There are two limiting screws: the low gear limit and the high gear limit. To adjust them, start at the top with the chain on the lowest gear.
Let’s adjust our low limit. That stop right there is where our screw hits the derailleur stop.
As I turn the screw, you can see it adjusting the derailleur’s position. If your chain hops over the last gear and hits the motor, tighten that screw until it prevents the chain from jumping that far.
Now, let’s shift into the highest gear, which is the smallest ring.
If you notice the chain jumping between the frame and the gear when shifting down, it means the high gear stop is not correctly adjusted. You’ll need to adjust that bolt as well.
As I turn it, you can see the derailleur move. Adjust it until it aligns perfectly with the last gear ring. Now, let’s test it.
As you can see, the chain stays in line, and there’s no jumping. Even when I shift back up and then down, the chain stays on the small ring without any issues.
E-Bike Maintenance: Battery
Next, let’s discuss battery maintenance. When it comes to battery maintenance, there isn’t much to do. The main focus is to keep the battery dry and clean.
If you ride in the rain, make sure to remove the battery afterward and dry it out. Clean the contacts if they get dirty. These are the essential points.
However, there are a few more considerations to keep your battery in good condition.
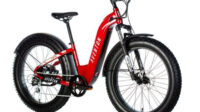
In the case of a bike like the Waukee X3, where the battery is hidden inside the frame, it’s easy to forget about some of these factors.
So let’s go over them. One crucial thing to remember is not to leave the battery on the bike in extreme conditions.
If it’s extremely cold or hot and sunny, make sure to bring the battery indoors. Extreme cold refers to temperatures below approximately -5°C, while extreme heat refers to temperatures above 35-40°C.
You don’t want to leave the battery exposed to such conditions, whether it’s freezing or scorching.
Charging is another aspect to consider. Avoid charging the battery below 0°C or above 30°C.
The battery prefers to be charged within a comfortable temperature range, and charging it when it’s too hot or too cold can cause damage.
Additionally, it’s not recommended to store the battery at full charge. If you won’t be riding your bike for more than a couple of days, it’s best to drain the battery slightly.
Keeping it at around 50% charge is ideal if you’re going on vacation or not riding during the winter. However, if draining to 50% is not possible, even discharging around 5% by taking a quick ride around the block helps.
It’s important not to leave the battery at 100% charge for extended periods as it can accelerate aging and affect the battery’s chemistry.
Also read about The Difference Between Throttle and Pedal Assist For E-Bikes.
E-Bike Maintenance: Air Pressure
Now let’s discuss air pressure. This is especially important to monitor when you have fat tires like these. With narrower tires, it’s easy to notice when you’re losing pressure.
You can see the sag and may even feel the rim hitting, which should be avoided. However, fat tires are more forgiving, and you might not realize that your air pressure is dropping over time if you’re not vigilant.
Luckily, it’s effortless, and all you need is an air pressure tester, which you can find for around three bucks or even cheaper at places like AutoZone near the checkout.
Simply remove the valve stem, attach the tester, and it will show you the current pressure. Right now, mine is at about 24 psi, which is ideal.
I prefer to keep my fat tires between 20 and 25 psi when riding on the street. If I’m going off-road, I’ll lower it to around 10 to 15 psi for better traction. It’s important not to let your tires get too low, especially the front one, as it significantly impairs handling.
If the front tire is underinflated and you make a turn, you could end up with the tire going one way, your body going another way, and your wheel going somewhere else.
It’s simply unsafe. So, it’s crucial to maintain proper air pressure, especially in the front tire.
I personally like to keep a battery-powered pump handy. It’s more convenient than using a manual hand pump. These pumps are super easy to use.
Just screw it on, push the power button, and it starts pumping. You can set it to the exact pressure you want, and it saves your arms from getting tired compared to a manual pump.
Plus, they are quite efficient. With one charge, you can generally fill around 10 to 15 fat tires.
E-Bike Maintenance: Spokes & Wheels
Another area to consider for maintenance is your spokes and wheels. Most of the time, your spokes will be fine.
However, if you’re a heavier rider, cover more miles, or have a more powerful hub motor, you may find some spokes starting to loosen up. If you neglect them, the loosened spokes will put more tension on other spokes, leading to further loosening.
Eventually, it can result in broken spokes, which is problematic. Therefore, it’s important to check your spokes regularly to ensure they are in good condition.
The easiest way to do this is by running your fingers along the spokes and making sure they all feel equally tensioned.
If you come across a rattling spoke, it means it has loosened and needs to be tightened using a spoke wrench. You can easily find inexpensive spoke wrenches, and you might even have one without realizing it.
Some e-bike multi-tools include a spoke wrench among the different sizes, specifically designed for spoke nipples. The nipple is the end of the spoke, and there are different sizes of nipples, depending on your bike.
It’s essential to find the right size wrench for your bike. Be cautious when working with spokes if you’re not familiar with it. Over-tightening or loosening them too much can throw your wheel out of true.
If you find a loose spoke, tighten it just enough to restore its tightness and similar tension. You can even use the guitar method by plucking the spokes to hear a sound similar to a guitar string.
Make sure to match the pitch. Avoid over-tightening the spokes, as it can cause the rim to go out of true.
If you’re interested in learning more about truing wheels, I have a video dedicated to that topic which you can find through the link here. However, truing wheels goes beyond beginner maintenance.
E-Bike Maintenance: Bolt Torque
Now let’s discuss another important aspect of bike maintenance, which is checking all the bolts on your bike.
I’m not suggesting that you need to do this every time you ride, but believe it or not, things can loosen up over time. It happened to me just a few weeks ago while riding a bike that I frequently use.
Although it wasn’t this specific bike, I suddenly heard a strange noise from behind. When I turned around, I noticed that the kickstand was hanging off the bike.
One of the two bolts holding it in place had fallen out, leaving the kickstand dragging on the street. Even someone like me, who you would assume knows a thing or two about bikes, can forget to check these things from time to time.
Therefore, it’s a good idea to inspect your bike periodically, looking at all the important bolts to ensure that everything is securely fastened.
Pay attention to crucial components like brakes, headset bolts, and steering stem. Any loosening of these bolts could pose a significant risk.
While a kickstand falling off is not as critical, as long as it doesn’t interfere with the spokes, any important bolts should be inspected regularly. Make sure they are properly torqued and tightened, with no signs of looseness or rattling.
If you’re particularly concerned, you can make it easier for yourself by using a paint pen to mark a line across the bolt and onto the bike or brake caliper, aligning them.
This way, you can quickly check if the line is still aligned, ensuring that the bolt hasn’t moved.
It’s highly unlikely for a bolt to make a complete 360-degree turn, but it’s always better to be cautious.
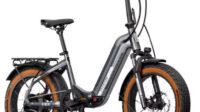
If you own a folding bike like the Ado Air, you should also check the bolts and folding mechanisms regularly. It is crucial that these components remain in place and securely tightened.
Whether it’s the folding mechanism in the middle of the bike or at the handlebars, any loosening can be extremely hazardous.
Therefore, when inspecting your important bolts, remember to check these folding mechanisms to ensure that everything is safe and secure before each ride.
Lastly, one additional maintenance step I would include is cleaning your chain. However, this doesn’t need to be done as frequently as the other tasks mentioned.
I will soon release a comprehensive video on cleaning every part of your bike, but since this particular bike has a belt drive, it doesn’t apply here.
Rest assured, I will cover this topic extensively in the upcoming video. So, these are the major maintenance tasks that I believe you should perform on a daily to weekly basis.
- 12 Kata-Kata Bijak Pentingnya Komunikasi yang Baik, Tiket Menuju Sukses – November 15, 2023
- 35 Quotes tentang Public Speaking yang Menginspirasi – November 15, 2023
- Review Sepeda Listrik Uwinfly Dragonfly 7 (DF7) – November 14, 2023

